*** HERE ***
Please submit by Wednesday, 530pm
(I assure you it is an easy one.)
*** HERE ***
And, of course, have a fantastic Winter Break. =)
Everyone will come up to the instructor's computer and give a 5-minute (maximum!) presentation using PowerPoint.
After the class, the exam will be made available here: EXAM
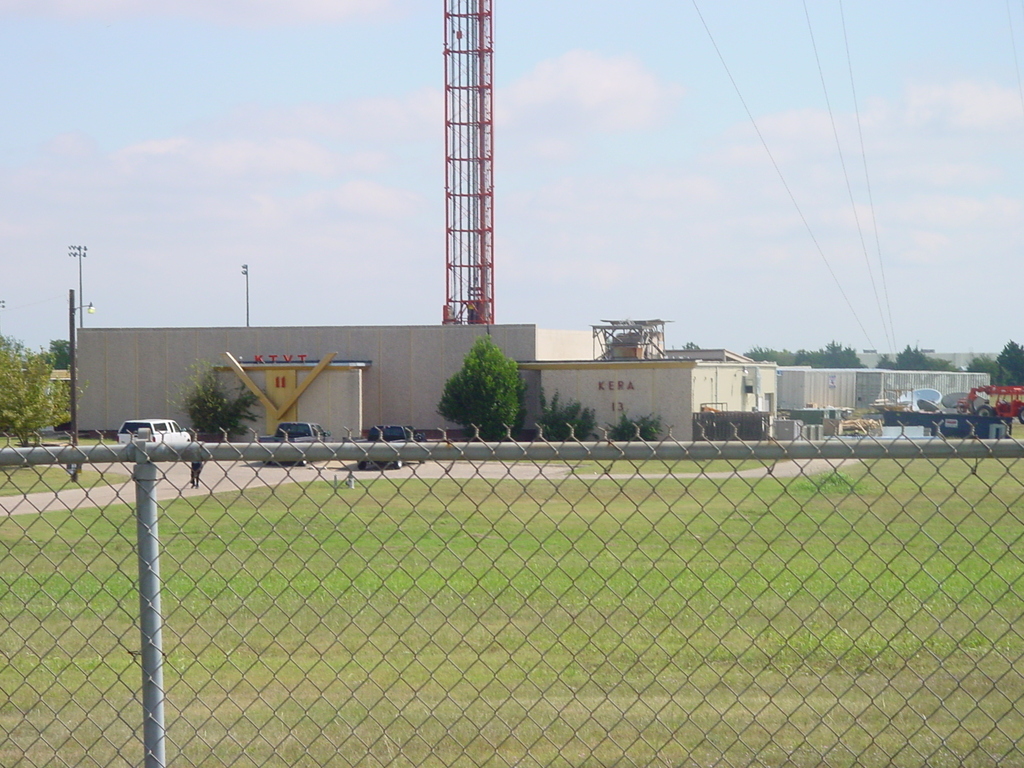
Viewshed Analysis
- Background info
- Calculate coverage from the KERA radio antenna (We are actually using their main antenna in Cedar Hill, which they lease from channel 11.)
- Download data here
- Tower height: app. 1100 ft.
You include these variables in the analysis as attributes in the point feature class.
Things to note: (1) We will need to convert the Kera tower point to meters and (2) we will need to convert the height from feet to meters.
_____________________________
Automation of Shortest Path
- NOTE: I have never done this using the ModelBuilder. We will figure it out together. Homework will be to complete it as best you are able.
- Use this military path data.
Overview of Steps for Calculating Shortest/Least Cost Path
- Create raster file for each individual rule. These will be either distance/proximity rasters or direct conversion of feature to raster.
- Reclassify each rule to a common 0-10 scale. Remember, this is calculating the least cost path, so the lower the value the more optimal that piece of terrain is to traverse over. One (1) will therefore represent the most optimal terrain to traverse incrementing up to ten (10) which representing the least optimal. Zero (0) is reserved for those areas where it is impossible for the path to be drawn, regardless of any other criteria. Yes, this is the opposite from suitability analysis, which uses 10 as the most suitable.
- Create a layer containing zero's and one's. Areas with a zero represent terrain that the path cannot be drawn. Meaning this represents areas where at least one of your inputs contained a zero. There are two steps to complete this.
- Multiply all reclassified layers together in the Raster Calculator. This will generate a new raster where the areas that were reclassified as zero (0) in any layer will be marked as zero's.
- Replace all areas greater than zero (0) with a one (1). In the Raster Calculator, perform a boolean (true/false) operation looking for areas in the raster created above are greater than zero (0). For example, '[Calculation1] > 0'.
- Perform your weighted average on your original reclassified rasters. Identical to weighted averages we performed for suitability, in the Raster Calculator, the formula is [raster] * weight + [raster] * weight, etc..
- Remove the areas from the result of your weighted average that are impossible to traverse, meaning at least one reclassified raster contained a zero (0) at that cell's position. There are three steps to accomplish this.
- In Raster Calculator, multiply the result of your weighted average against the raster you generated (in step 3 above) containing the zero's and one's. This will replace the values in the areas impossible to traverse to zero's.
- Convert the result of the above step into an Integer. In Raster Calculator, click the double-arrow button on the bottom right to pull up some additional buttons. Click the Int button. This will bring up 'Int()', and your cursor should be within the parentheses. Double-click your raster generated in the last step and Evaluate.
- Use 'ArcToolbox/Spatial Analyst Tools/Extraction/Extract by Attributes' to permanently remove areas with a cell value of zero (0). The 'Where Clause' should be 'Value > 0'. You have now created your cost raster!
- Generate Cost Distance and Cost Direction rasters from your starting position. There are two steps to accomplish this.
- Select (highlight) your starting position.
- In the Spatial Analyst Toolbar, use the 'Distance/Cost Weighted' tool. Specify your starting position (which you just highlighted), your cost raster (completed in step 5), and check the box to 'Create Direction'.
- Generate your Path (finally, yeah?). There are two steps to complete this step.
- Select (highlight) your ending position.
- In the Spatial Analyst Toolbar, use the 'Distance/Shortest Path' tool. Specify your ending position (which you just highlighted), your Direction and Distance rasters (which you just generated in step 6), and the 'Path Type' should be 'For Each Cell'. Run It!
- Eight? There be no eight, matey. You scallywags be needing only seven, I tell ya.
- KMZ File containing
- Paths from A to B and from B to C
- Mission Points
- Known/suspected mine fields
- Known/suspected enemy locations
- Edited highway layer
- Word document describing the process and your decisions
(12/06) Presentations, paper requirement abolished
(12/06) Final take-home as originally planned
(12/10) Shortest Path Due, via email
- Work on your own files for the shortest path exercise. Things have been wild leading up to GIS Day last week, and an unfortunate accident happened to my son. This combined to push me out of work and email for some time and let's just take care of this right now.
- Discuss remaining schedule
- 3D Visualizations Exercise (DATA) - Fun Stuff! (data source)
- Export to Google Earth
- 3D Analyst Export to KML (KMZ)
- Template for method 2
** No Class Nov 15 **
Last Minute GIS Day Preparations driving me crazy.
Hopefully see many of you guys on Wednesday!
I think I have now received all group terrain edits and will redistribute by this afternoon.
Thanks guys!
3D Exercise
- Download Exercise
- Exporting to Google Earth using 3D Analyst and also KML manual editing (for higher resolution)
:: Shortest Path (least cost) analysis will be done in Spatial Analyst.
:: Each team will turn in a KML file, not ArcGIS files. We will discuss ArcGIS 3D Analyst and Google Earth next week.
:: Least Cost Procedure Background
- Run through Military Path demo
- Down data here
Download guide here(incorrect version, will post corrected version after class)- Each team will create a new (and unique) military terrain in the San Juan Mountains.
- Create, by hand:
- Mission Points
- Known/suspected mine fields
- Known/suspected enemy locations
- Edited highway layer
- Please make it possible for other teams to generate a path
- Take into consideration that the path cannot traverse over:
- Water Bodies
- Highways (delete segments to create a passable terrain)
- Teams will then trade these created terrain scenarios.
- Shortest path project will be based on:
- Traverse through the military terrain provided to each team, taking into consideration any of the datasets provided in the San Juan Mountain geodatabase (download from UTA server). The more datasets included in the generated path, the better. The best projects will make unique and creative uses of the various datasets available.
- Why San Juan Mountains and not here in Texas? Our topography is boring.
Turn in a .ZIP file via MavSpace or CD
In the .ZIP:
- + Instructions for me. (I assume you will want me to install the data directly to the c:/ DRIVE)
- + Data
- + MXD (bonus if you create a toolbar with buttons that work)
- + Toolbox
Seems there were some issues with the Erase tool, which is actually a very powerful analysis tool.
I heard over the weekend that it is not available on the student license. Oops, this is correct and I forgot.
I heard right before class that there were SQL errorsd when run. I will investigate this over the week.
Bottom line? Forget about the homework. I appreciate all efforts to complete it and I am sure the frustrations just make you all like me *even more*! Everyone gets full credit and I will investigate.
- Reminder about GIS Day
- Go over exam
- Add a custom toolbar in ArcMap and add a button referencing a geoprocessing tool
- Review Pizza Demo model as a reference
- Open session to work on projects
Code to call a geoprocessing tool from VBA button:
Also need to ensure the ESRI GeoprocessingUI Libraries is referenced.Private Sub UIButtonControl1_Click()
Dim pApp As IApplication
Set pApp = Application
Dim pUID As New UID
pUID = "esriGeoprocessingUI.ArcToolboxExtension"
Dim pATBExt As IArcToolboxExtension
Set pATBExt = Application.FindExtensionByCLSID(pUID)
Dim pAtb As IArcToolbox
Set pAtb = pATBExt.ArcToolbox
Dim pTool As IGPTool
Set pTool = pAtb.GetToolbyNameString("buffer_analysis")
Dim pParams As IArray
Set pParams = pTool.ParameterInfo
Dim pParameter As IGPParameter
Dim pParamEdit As IGPParameterEdit
Dim pDataType As IGPDataType
Dim sValue As String
'First Parameter
Set pParameter = pParams.Element(0)
Set pParamEdit = pParameter
Set pDataType = pParameter.DataType
sValue = "D:\workspace\Newfoundland.mdb\roads"
Set pParamEdit.Value = pDataType.CreateValue(sValue)
'Second Parameter
Set pParameter = pParams.Element(1)
Set pParamEdit = pParameter
Set pDataType = pParameter.DataType
sValue = "D:\workspace\Newfoundland.mdb\roads_buf"
Set pParamEdit.Value = pDataType.CreateValue(sValue)
'Third Parameter
Set pParameter = pParams.Element(2)
Set pParamEdit = pParameter
Set pDataType = pParameter.DataType
sValue = "500 Meters"
Set pParamEdit.Value = pDataType.CreateValue(sValue)
Dim pCommand As IGPToolCommandHelper
Set pCommand = New GPToolCommandHelper
pCommand.SetTool pTool
pCommand.Invoke pParams
End Sub
NOVEMBER 8 :: New Coastguard Facility Automated Model
NOVEMBER 22 :: Military Terrain Path
Create a Site Selection Suitability Model
- We will decide in class what to focus on
- This will give us the opportunity to discuss/review SimplyMap, ESRI TIGER, and ReferenceUSA
Download it!
Model I Made!
Reminder about GIS Day!
Grade Distribution
- 100%: 8
- 90%: 2
- 80%: 7
- 70%: 2
- Below 70%: 2
Redo any question you did not answer correctly and resubmit exam next Monday for 1/2 credit of each question missed. For this reason, I will not go over the exam until next week.
By the way, question 9? Most exams that did not earn 100% got this one wrong, and the wrong answers were not all the same. Please note this question simply asked you to multiply the three layers together, nothing more.
EXAM - DATA
Due to the excessively high (in my opinion) numbers of students who have contacted me about not being able to attend this evening's class to take the midterm, I have decided it best to let everyone take the exam as a take-home exam instead of designing customized exam situations for those who cannot make it. I think is the most fair for everyone involved.
So, here is how we will play this one...
At 5:30pm, when class/exam *would* have started, a post will be made on this site with a link to the exam. It will be filled out on the online form that the link will direct you to. The exam must be submitted but tomorrow (10/19) 7pm. At this time the form will be taken offline. No exceptions. Zero. None. This is the most fair I can think to make this and any further problems any students may have will need to be worked around.
As this exam is now completely take-home, there is no need to come to class at 5:30pm this evening. But, of course, you may if you wish take the exam in the classroom during class time. I will not be physically in class this evening (as I do not expect a large showing), but I will be on Meebo chat (IM) to help with any confusions.
Remember the following exam rules:
+ Be Honorable!
+ Open books, notes, internet
+ No working with any others in any way (Be honorable, please do not cheat. Even if not caught, it is never worth it.)
+ GOOD LUCK!
EXAM - DATA
Exam Details:
- In-class
- Open textbook, notes, Internet
- No sharing or communication during the exam (in-person, texting, chatting, etc.)
- All questions will be straight answers. This means there will be no images printed nor files submitted.
- Partial credit is not to be expected and is available only under specific and unique situations.
- The exam will be given to you in print and online. You will fill the answers on the print paper and submit it.
Sample Questions
- Create a layer representing the slope of Arlington Quad. If you create 10 equal classes, what is range that represents the highest values (steepest)? [31.92996713 - 35.47774124]
- Data
- projectednad83 file elevation is meters and spatial reference is nad83 (arctoolbox/data management tools/projections & transformations/raster/project raster) - Use UTM NAD1927 Zone 14N -OR- Set data frame to that reference and export raster same as data frame
- Create a layer representing the distance (in feet) from major roads in Tarrant County. If you create 10 equal classes, what is the range that represents the highest values (furthest)? [33,601.44376 - 37,334.9375]
- If you do not have a major roads file readily available,download pizza demo for major roads (arterials)
- Situation: Particular animal species known to always travel within .5 km of a particular vegetation type. If you were to create a reclassification scheme of the distance to this vegetation type, in order to identify possible locations to find the species, (1) what is the minimum number of classes you need to create? and (2) what would be the break points of these classes? [2 classes] [.5 km and max value]
- If you needed to include population density, that was obtained from the American Factfinder Census website, as an input into suitability analysis, would you use distance-straight line or convert feature to raster? [convert feature to raster]
- An analyst used the Raster Calculator to multiply two raster layers together. Afterward, he could not locate the generated Grid file to back up his work? What could he have done to ensure that the result of the Raster Calculator will store the result in a folder of his/her choosing? [specify working directory in spatial analyst options]
- Take these two raster files and compute a weighted average. The weight of the d_roads file will be 25% and the wieght of the income file will be 75%. If you create 15 equal classes, what is the range that represents the highest values? (data) [394,166.8793 - 422,321.6563]
Items Discussed Today:
- Geoprocessing Tools in ArcToolbox
- Creating a Model
- Including Geoprocessing Tools in Model
- Adding Parameters
- Environmental Settings
- Convert this table into a shapefile.
- First convert to temporary event class
- Right-click/Display XY Data
- X: Long
- Y: Lat
- Spatial Reference: NAD 83
- Second export the event class to new shapefile
- Right-click/Data/Export Data
- Convert this table into a shapefile exclusively using the Geoprocessing Tools. (No right-clicking and no toolbars.)
- Create Temporary Layer: ArcToolbox/Data Management Tools/Layers and Table Views/Make XY Event Layer
- Copy to New Shapefile: ArcToolbox/Data Management Tools/Features/Copy Features
- Create an Automated Model that does the same thing as the above procedure.
- Create a new Toolbox in ArcCatalog (right-click/New Model)
- Add this Toolbox to ArcMap (right-click ArcToolbox/Add Model)
- Create a new Model in the Toolbox (right-click/New Model)
- Edit Model (Right-click Model/Edit)
Thank you for working hard and turning in your projects!
Enjoy the cool weather and the week off! Have fun!
Turn in via Mavspace
Steps:
- Which variables to select
- Ensure that all files are in a linear projection system (I suggest TSMS)
- Set the working directory and extent of spatial analyst
- Decide for each individual layer you have whether you need (1) proximity or (2) Straight values
- Reclassify
- Use raster calculator to calculate the weighted average
- Use boolean expression to locate most suitable locations
- Packed up zip file containing:
- Word file
- Team member names
- List of variables used
- Rationale to the reclassification and weighting decisions
- MXD File
- Work!
- Neat
- Remember this is the first thing I will look at.
- Data
Example file
Convert the following files to the TSMS used in the above file:
- Elevation (prepared NED)
- Number of households (prepared households)
Subscribe to:
Comments (Atom)